
Thinking about selling your laptop, or just want to dial up your privacy? Taking a few minutes to remove your Microsoft account is one of the smartest things you can do. It’s the single best way to protect your personal data—everything from private documents and photos to your saved browser passwords. It's a simple process, and this guide will make it easy for you.
Why You Should Remove Your Microsoft Account

When you first set up a new Windows laptop, it usually nudges you to sign in with a Microsoft account. It’s undeniably convenient, syncing your settings, OneDrive files, and preferences across all your devices. But that convenience has a trade-off: your personal data gets deeply woven into the operating system and is constantly connected to the cloud.
If you’re planning to sell, give away, or even repurpose your old laptop, leaving that account active is a major security risk. It’s like leaving the keys to your house in the front door. For anyone in Redhill, Merstham, or the surrounding Surrey area getting ready to sell their tech, this is the most important step you can take.
Understanding The Key Difference: Microsoft vs. Local
The whole point of removing your Microsoft account is to switch over to what’s known as a local account. Here’s a quick, simple look at the main differences between using a Microsoft account and a local account on your Windows laptop.
Microsoft Account vs Local Account Quick Comparison
In short, switching to a local account severs the link between your personal cloud data and the physical device. This ensures the next owner gets a completely fresh start, and more importantly, it means you can bring it to our shop in Redhill with total confidence that your data is safe and sound.
Your digital privacy is paramount. Removing your Microsoft account isn't just a technical step; it's a fundamental action to protect your identity and personal information before your laptop changes hands.
The Growing Importance of Digital Control
Here in the UK, the conversation around data privacy and having control over our digital lives is more relevant than ever. People are becoming much more aware of their digital footprint and are actively looking for ways to manage it.
This isn’t just a passing trend. According to Microsoft’s own Government Requests for Content Removal Report, the UK submitted two government requests for content removal from their services. One was actioned and one was not, giving a 50% action rate. While these numbers are small, they highlight a growing interest from both users and official bodies in controlling our digital identities.
This guide will break down the process of removing your account into simple, manageable actions. We’ll walk you through everything from securing your files with a backup to making the switch and completely unlinking your laptop from Microsoft's servers.
Getting this right provides genuine peace of mind. If you find yourself stuck or have any questions about preparing your device for sale, just get in touch via our contact form at https://www.exe.co.uk/#form. We're always here to help.
First Things First: Secure Your Files
Right, before we dive into any settings, let's talk about the single most important step: protecting your data. It's the one thing people always seem to skip when removing a Microsoft account from a laptop, and it can lead to absolute disaster. Just imagine losing years of family photos, vital work documents, or that uni dissertation you poured months into. It happens far more often than you’d think, but it's completely avoidable.
This isn’t just a scare story. People genuinely struggle with this. One user in the UK shared a nightmare experience of getting locked out of their Microsoft account and losing access to everything, even after spending six months and hundreds of hours trying to get back in. You can read their full story on Microsoft's official forum – it’s a stark reminder of why you can't rely solely on cloud storage tied to one account.
Taking a few moments now to back up your files is your insurance policy against this kind of chaos. We see this issue all the time with customers from Reigate and Horley, and trust me, a little bit of prep saves a world of pain later on.
Your Simple Backup Game Plan
The aim here is simple: get a complete copy of everything you care about onto a separate device, one that’s totally independent of your laptop and your Microsoft account. The two easiest and most reliable ways to do this are with an external hard drive or a different cloud service.
- External Hard Drive: This is the classic, no-fuss method. Plug in the drive, drag and drop your important folders, and you've got a physical copy that you own and control. It’s simple, secure, and doesn’t need an internet connection to work.
- Alternative Cloud Storage: If you're more of a cloud person, that's fine too. Just use a different service like Google Drive or Dropbox. The key is that it’s not your OneDrive, since that's tied to the very account we're about to remove.
Before you go any further, it's also a good idea to get familiar with some essential data loss prevention best practices. Knowing these principles will give you that extra bit of confidence that you've got all your bases covered.
The Must-Check Folder Checklist
So, where is all your important stuff actually hiding? It’s surprisingly easy to miss a crucial folder if you're in a rush. To make sure nothing gets left behind, go through and copy the entire contents of these key locations:
- Desktop: We all use it as a digital pinboard for quick access. Don’t forget to sweep everything off it.
- Documents: This is the default home for most of your text files, from work reports to personal letters.
- Pictures & Videos: This one's a biggie. Make sure you grab every last photo album and home movie.
- Downloads: A black hole for important PDFs, software installers, and random files you saved from the web. Sift through it carefully.
- Music: If you’ve got a treasured MP3 collection stored locally, now’s the time to back it up.
Takeaway Tip: Don't just drag and drop. Actually open a few files from your backup drive or cloud folder to check they’ve copied over correctly. A successful backup is a verified backup.
Once you’re absolutely certain that every last important file is safely tucked away, you’re ready to move on. If you hit a snag or just want an expert to handle it for you, our team in Redhill is always ready to help. Just fill out the simple form at https://www.exe.co.uk/#form and we'll be in touch.
Switch to a Local Account on Your Laptop
Right, with your files safely tucked away, it’s time for the main event: switching your laptop over to a local account. This is the single most important step in the entire process.
Think of it this way: a local account lives only on your laptop. It's completely separate from Microsoft's online ecosystem, meaning your profile is no longer tethered to the cloud. It’s the cleanest way to take back control of your device’s privacy without going through the headache of a full Windows reinstallation.
The best part? When you make this switch, all your programs and existing files stay exactly where they are. You're just cutting the cord to Microsoft's servers, not nuking your setup.
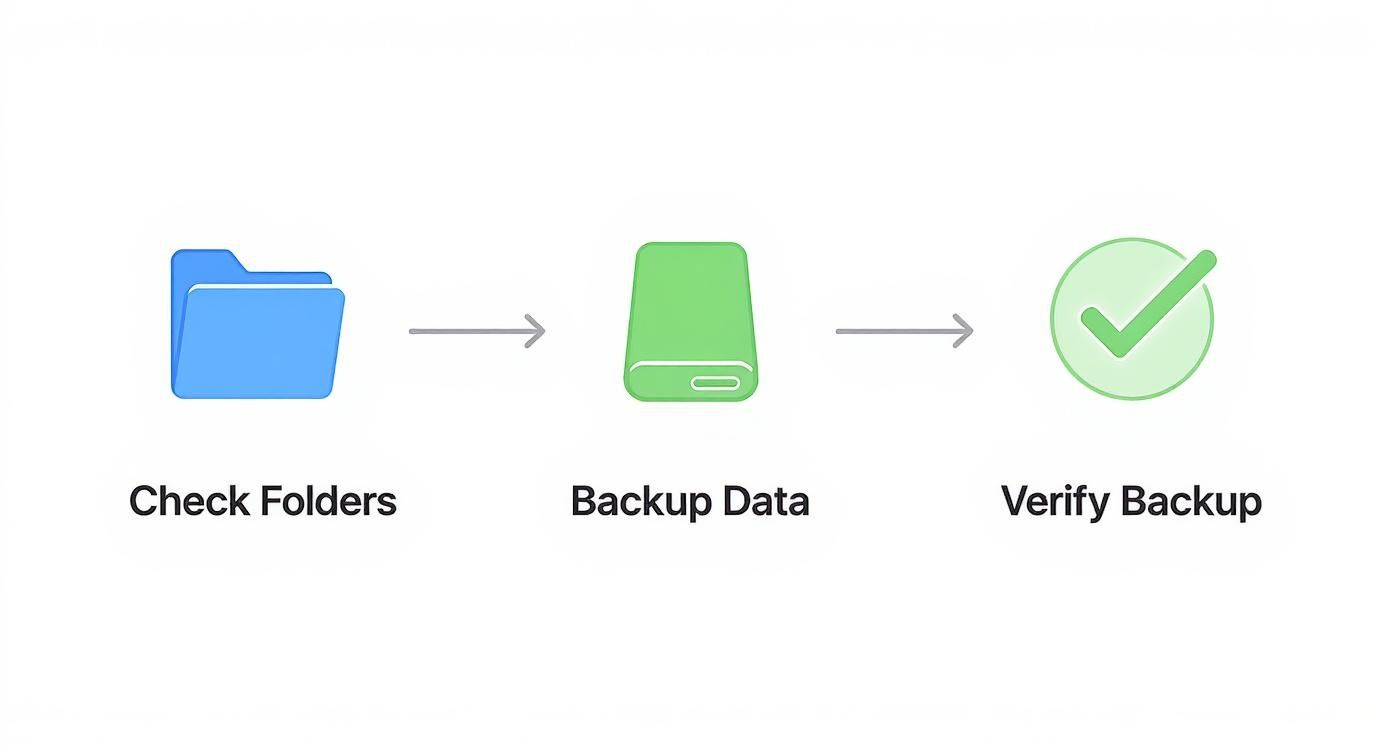
Before we dive in, this simple diagram shows the logic we just followed for backing up—it’s not just about dragging files over, but a proper check, copy, and verify process.
With that sorted, let’s get your account switched.
Getting to the Right Place in Your Settings
Whether you're on Windows 10 or 11, the process is pretty similar, though the menus look a bit different. The journey always begins in the Settings app.
The quickest way to get there is to press the Windows key + I on your keyboard. You can also just click the Start button and type "Settings". This is your main control panel for the whole machine.
Once the Settings window is open, you’ll want to find the Accounts section. This is where you’ll manage everything to do with your user profile.
How to Make the Switch in Windows 11
If you're using a newer laptop with Windows 11, the steps are nice and direct. Here’s what you need to do:
- In the Settings app, click on Accounts in the left-hand menu.
- From there, choose Your info. This page shows all the details of your currently logged-in Microsoft account.
- Now, look for a link that says Sign in with a local account instead. Give that a click.
Windows will ask you to prove it’s really you by entering your current Microsoft account password or PIN. It's a quick security check to make sure nobody else is trying to take over your profile.
A Quick Heads-Up: If you can't remember your Microsoft password, you're stuck at this point. You’ll have to go through Microsoft’s online password recovery process first before you can come back and complete this step.
Once you’ve verified your identity, you get to create the new local account. You’ll set a username, a new password (make it a good one!), and a password hint. Remember, unlike a Microsoft account, there’s no online recovery for this password, so that hint is your only lifeline!
How to Make the Switch in Windows 10
Still running a trusty Windows 10 machine? No problem. The path is almost identical, just with a slightly older-style menu.
Here’s the drill:
- Open the Settings app (again, Windows key + I is your friend).
- Click on the main Accounts category.
- On the left, make sure you're on the Your info tab.
- You should see an option clearly labelled Sign in with a local account instead. Click it.
Just like in Windows 11, you'll need to enter your current Microsoft password to prove you have the authority to make the change. After that, you'll create your new local username, password, and security questions.
Once you hit "Sign out and finish," Windows will log you out and take you to the login screen for your brand-new local account. You’re in!
This isn't an uncommon move, by the way. Microsoft's own policy changes, like those affecting OneDrive storage, have led many UK users to rethink how tied they want to be to cloud-based accounts. You can read about the latest OneDrive changes on The Register for a bit more context on why people are making this switch.
After you’ve logged into your new local account, you’ve made a massive leap forward in securing your laptop and your data. All your files and apps will be waiting for you, but that invisible link to the Microsoft cloud has been broken.
Of course, if you hit a snag or would rather an expert handles it from the start, we're always here to help. Just drop us a line using the secure form on our website: https://www.exe.co.uk/#form.
Unlink the Laptop from Your Microsoft Account Online
So, you’ve switched your laptop over to a local account. That’s a huge step, but we’re not quite at the finish line yet.
To be absolutely sure your digital life is separate from that old machine—especially if you plan on selling it—you need to make one final break. You have to tell Microsoft to forget this laptop ever existed.
Think of it like selling a car. You wouldn't want it to stay registered in your name after you've handed over the keys, right? This is the digital equivalent. It severs any lingering ties between your personal Microsoft account and that physical piece of hardware, which is a crucial final security step.
Why This Final Step Is So Important
Even after creating a local profile on the laptop itself, your Microsoft account still holds a record of that device. It keeps a list of every single machine you've ever logged into, which is great for security when you own them, but a bit of a liability when you don’t.
By manually removing the device from your account online, you're doing a few key things:
- Preventing weird sync issues with your other devices down the line.
- Revoking any leftover trust or permissions that machine might still have.
- Making sure the new owner can’t accidentally trigger security alerts tied to your account.
This finalises the separation. It means that when the laptop leaves your hands—whether you’re dropping it off with us in Redhill or we’re collecting it from you in Merstham—your connection to it is completely and utterly gone.
How to Unlink Your Laptop Online
This part of the job isn't done in your laptop's settings menu. You’ll need to pop over to the official Microsoft account website, which you can do from any web browser on any device.
- First, head over to account.microsoft.com.
- Sign in with the same email and password for the Microsoft account that was on the laptop.
- Once you’re in, look for the Devices tab, which is usually right there in the top navigation bar. Give that a click.
- You’ll now see a list of every device connected to your account. Find the laptop you’re getting ready to sell—you should be able to spot it by its name (like "LAPTOP-ABC123" or whatever you named it).
- Click on Show details for that specific device.
- On the next screen, you’re looking for an option that says Remove this device or something similar like Unlink. The wording can change slightly, but the goal is the same.
- A little confirmation box will pop up to make sure you’re serious. Just tick the box that says "I'm ready to remove this device" and then click the final Remove button.
And that’s it! You’ve officially told Microsoft's servers that you no longer own that laptop. It’s a simple but powerful move that so many people miss, but it's absolutely essential for a clean break.
Account Removal Checklist for Selling Your Laptop
If you're getting your laptop ready to sell to us here at EXE, this simple checklist will ensure you’ve covered all the bases. Follow these steps to make sure your data is completely secure before you hand it over.
Once you’ve ticked off these items, your device is perfectly prepped and ready for its next life. If you’re ready to get a great price for your old tech, just fill out the simple form at https://www.exe.co.uk/#form to get a free, no-obligation quote from our team.
Wiping Your Laptop Clean for a Sale
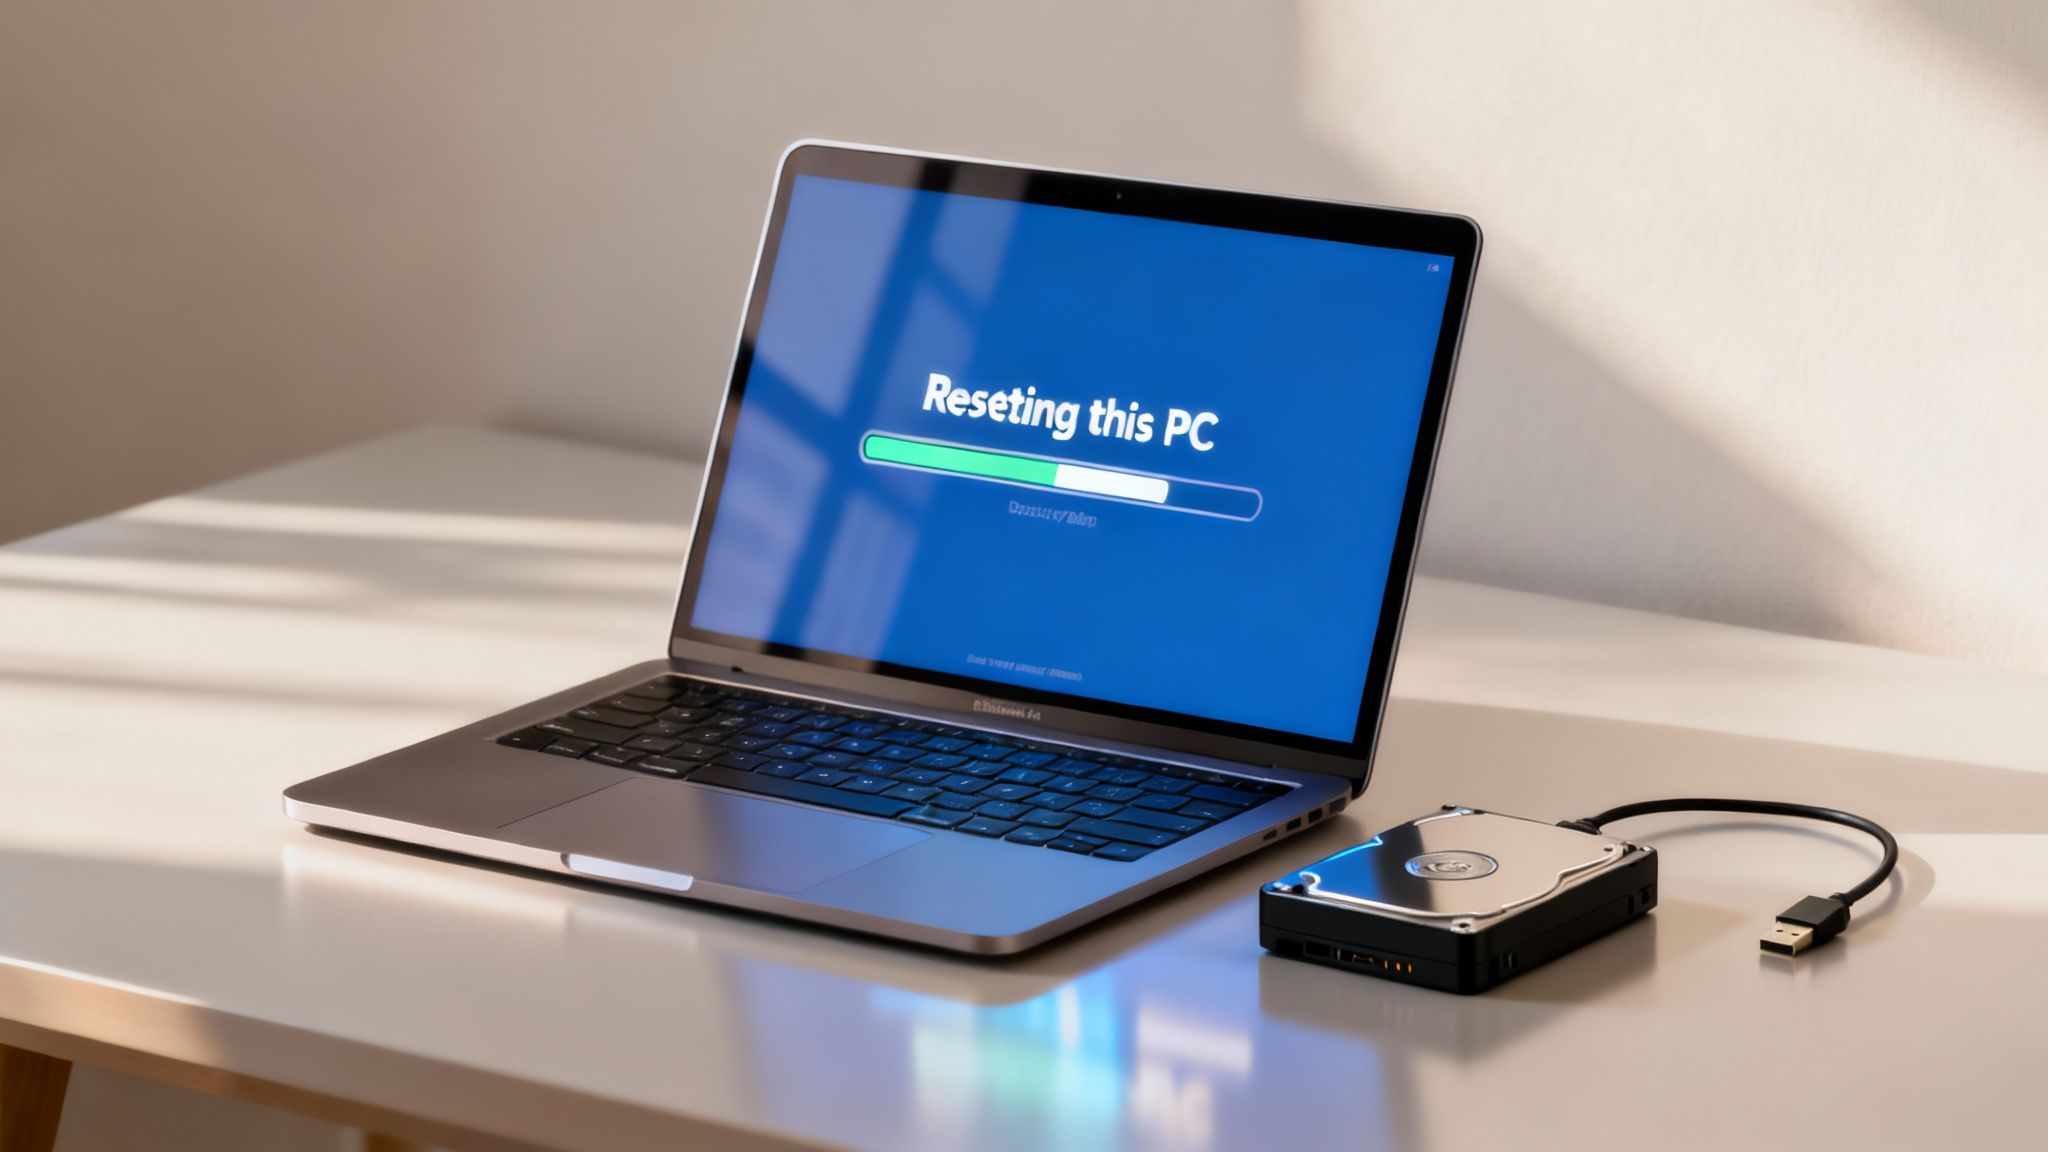
You’ve backed everything up, switched your account over, and even told Microsoft to forget your device. So, that’s it, right? Not quite. If you’re planning on selling your laptop, there’s one last step you simply can’t skip: a full factory reset.
This is the only way to get a truly fresh start. While the previous steps are great for untangling your personal accounts, a proper reset goes much, much further. It completely erases everything on the hard drive and reinstalls a brand-new copy of Windows, taking it back to the exact state it was in when it left the factory.
This process ensures no scraps of personal files, browser history, or old program settings are left behind for the next owner to find. Before you even think about selling, it's vital to understand how to clear your laptop hard drive securely. It’s the ultimate peace of mind.
Why a Full Reset Is a Must for Sellers
Here’s a little secret about computers: simply deleting your files doesn’t actually get rid of them. When you hit delete, the computer just marks that space on the hard drive as available for something new. With the right software, a determined person could potentially recover that "deleted" information, which is a massive privacy risk.
A factory reset, especially when you choose the "Remove everything" option, actively overwrites that data, making it practically impossible to get back. This is the gold standard for data security when passing a device on. It’s exactly what we at EXE recommend to all our customers in Redhill, Reigate, and the surrounding areas before they bring their tech to us.
Using Windows' Built-in 'Reset this PC' Feature
Thankfully, you don't need any fancy third-party software for this. Windows has a powerful and straightforward tool called "Reset this PC" built right in, and it's the safest way to get the job done.
Here’s how you find it on both Windows 10 and 11:
- Pop open the Settings app (a quick way is pressing the Windows key + I).
- In Windows 11, navigate to System > Recovery.
- In Windows 10, you’ll find it under Update & Security > Recovery.
- Look for Reset this PC and click the button to get started.
Now you’ve reached the most important decision in the whole process.
Always, Always Choose 'Remove Everything'
Windows will present you with two main paths: "Keep my files" or "Remove everything." As you’re selling the laptop, the answer is a no-brainer.
- Keep my files: This option is great for troubleshooting your own machine, as it reinstalls Windows but leaves your documents and pictures alone. It is absolutely the wrong choice for a sale.
- Remove everything: This is the one you need. It wipes all your personal files, programs, and custom settings before installing a completely clean version of Windows.
Once you’ve selected "Remove everything," you might see another choice between a "Cloud download" or "Local reinstall." Honestly, either works perfectly fine for wiping the device clean. A cloud download pulls the very latest installation files from Microsoft, while a local reinstall uses files already stored on your PC.
Crucial Tip: A full reset can take some time, often over an hour. Make sure your laptop is plugged into the wall before you start. The last thing you want is the battery dying halfway through, which can cause some serious software headaches.
After you’ve made your selections and confirmed, the process will kick off. Your laptop will restart several times. You'll know it's finished when you see the initial Windows setup screen—the one asking you to choose your language and region.
That’s your cue to stop. Just hold down the power button to shut the laptop down. Don't go any further! The new owner should be the one to go through that first-time setup, creating their own account and making the machine theirs.
Your laptop is now completely sanitised, your data is secure, and it's in the perfect state to be sold. Once that’s done, you can bring it to our Redhill shop knowing your privacy is 100% protected.
Ready to sell, or just have a few more questions? We’re here to help. Fill out the simple form at https://www.exe.co.uk/#form for a quick, no-obligation quote.
Still Have Questions? Let's Clear Things Up
Even with the best instructions, it's totally normal to have a few last-minute questions before you wipe your personal account from a laptop. We get asked these all the time by customers from Redhill and the surrounding towns, so let's tackle the most common ones.
Think of this as a final checklist. Getting these sorted now means no nasty surprises down the line, especially when your files and paid-for apps are involved.
What Happens to My Microsoft Store Purchases?
This is easily the most popular question we hear, and for good reason. What about all those apps, games, or movies you bought from the Microsoft Store?
The short answer is: they belong to your account, not the laptop. Once you switch to a local account on that machine, you lose access to them on that device. But don't panic, they aren't gone forever. Your entire purchase history is linked to your Microsoft account. The moment you sign in on a new Windows computer, all your paid-for content will be right there, ready to download again.
It's an important distinction to make. The licence is tied to you, but you need to be logged into your Microsoft account to prove you own it.
Can I Switch Back to a Microsoft Account Later?
Absolutely. Nothing we've discussed is a one-way street. Switching to a local account is just changing how you log into that specific laptop; it doesn't delete your Microsoft account itself.
If you ever change your mind, you can flip back in a few clicks. You'd just reverse the process:
- Head to Settings > Accounts > Your info.
- Look for and select Sign in with a Microsoft account instead.
- Pop in your Microsoft account details, and you're back in business.
While it's great to have this flexibility, if you're planning to sell the laptop—whether to us in Merstham or anywhere else—you should always hand it over with a fresh local account or, even better, after a full factory reset.
Does Removing My Account Automatically Delete My Files?
This is a really critical point, and getting it wrong can cause a lot of heartache. Just switching from a Microsoft account to a local one does not delete your personal files. Your Desktop, Documents, and Pictures folders will stay right where they are.
The real danger comes from the factory reset. When you use the 'Reset this PC' feature and choose the 'Remove everything' option, it does exactly what it says on the tin. It's designed to wipe the drive clean. If you haven't backed everything up first, your data will be gone for good. This is precisely why we made backing up your files the very first step.
Always plan for the worst-case scenario. A backup isn't just a friendly suggestion; it's the only thing that stands between you and accidental data loss during a system wipe.
Is My Data Really Gone After a Factory Reset?
Yes, for all intents and purposes, it is. A full factory reset using the "Remove everything" option is the gold standard for securely erasing your data. It doesn't just mark the files for deletion; it actually overwrites the space they occupied, making it practically impossible for the next owner to recover anything.
This is the method we and the rest of the industry rely on to sanitise devices. It’s how we guarantee that every laptop we buy from customers in the Redhill area is completely clean, protecting the seller’s privacy and giving the new owner a fresh, secure start. You can be confident that after that reset, your personal information is safe.
At EXE, we make selling your old laptop simple, secure, and profitable. If you've followed these steps and your device is ready for its next life, we're ready to give you a great price for it. Get a fast, free, no-obligation quote by filling out our simple form at https://www.exe.co.uk/#form.


